

How To Make A Magic Faucet Fountain

Today I'g going to show y'all how to build a floating faucet fountain.
This is a pretty cool fountain that creates the illusion of a faucet that appears to magically bladder on a stream of water to a higher place the bucket.
Watch the video beneath and enjoy the magic of this amazing floating fountain!
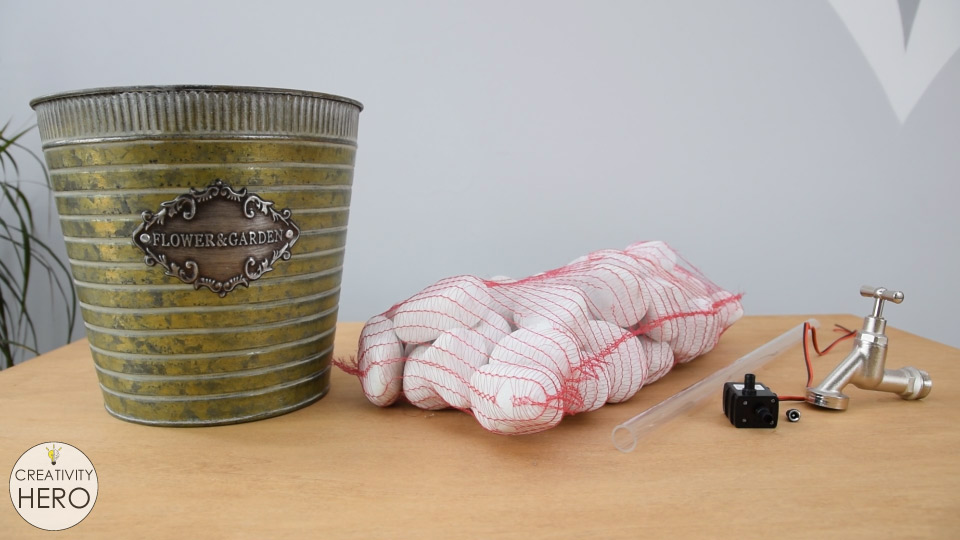
Materials:
- Galvanized Rustic Metal Bucket
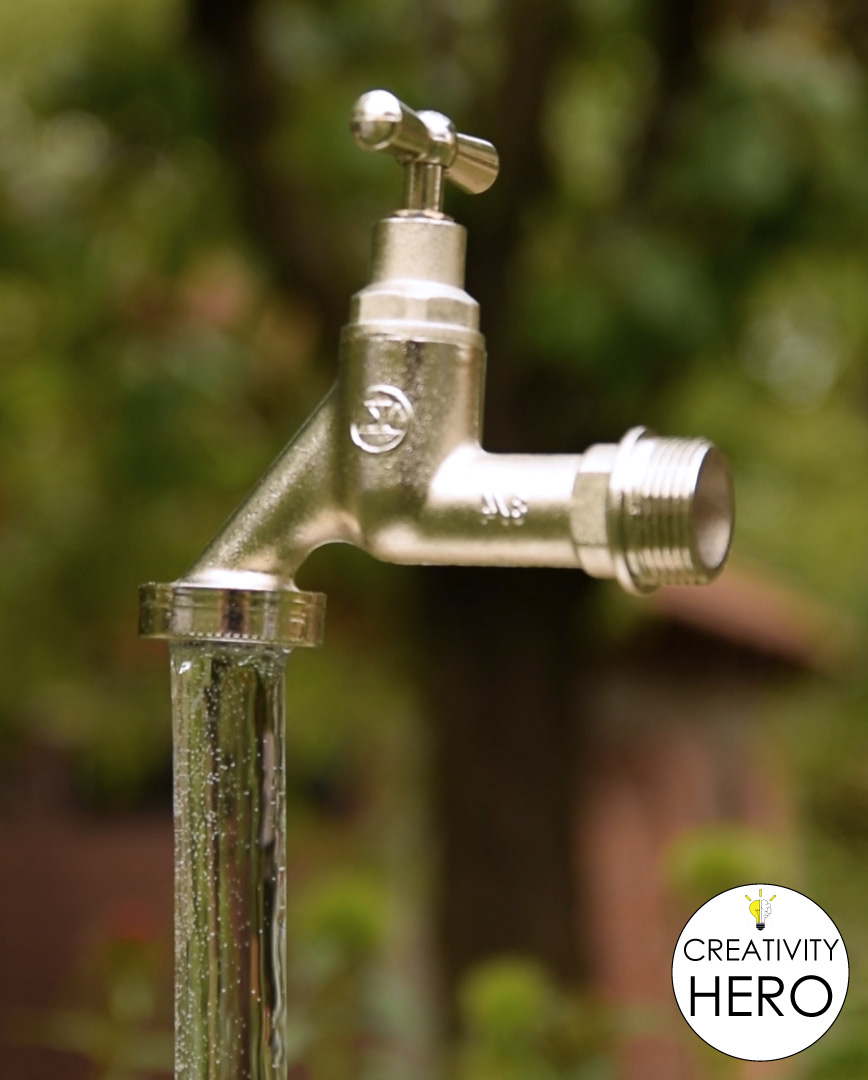
- Water faucet
- Rigid acrylic tubing
- H2o pump
- White pebbles
Tools:
- Soldering station
- Cordless drill
- Drill bit set
- Glue gun
- 5 min epoxy
Disclosure: As an Amazon Associate I earn from qualifying purchases.
At present let'south see how I build it!
For this project you lot're going to demand a saucepan, or whatsoever kind of waterproof container, a bunch of natural river rocks, a clear rigid acrylic tube, a minor submersible water pump and a spigot or faucet.
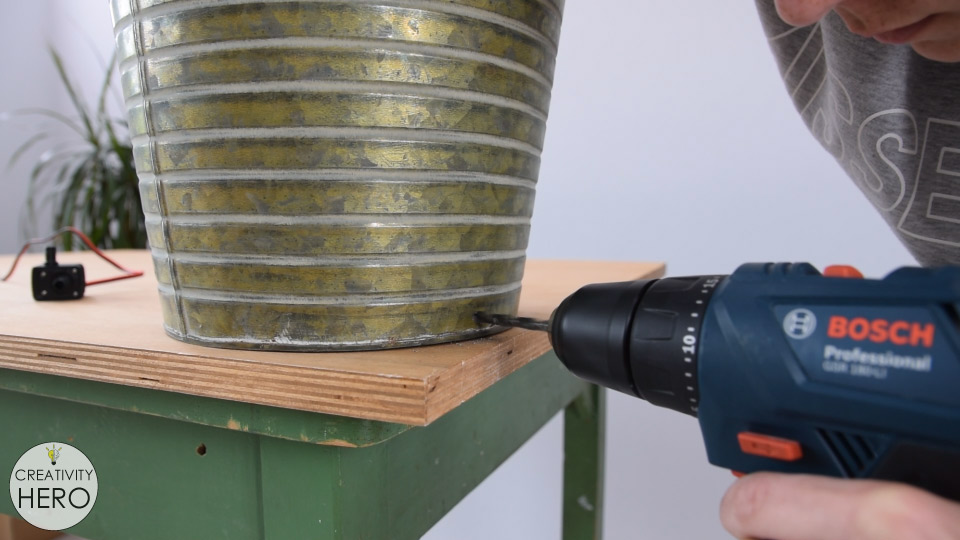
A submersible water pump is ideal for this project because it is tranquillity and easy to install. It will be placed at the bottom of the bucket, but I don't want the cord coming upward over the edge of the bucket.
And so, I'grand going to drill a minor pigsty down into the back of the bucket. The hole should be big enough to fit the cord of the pump, and for this purpose I'k using vi mm drill scrap.
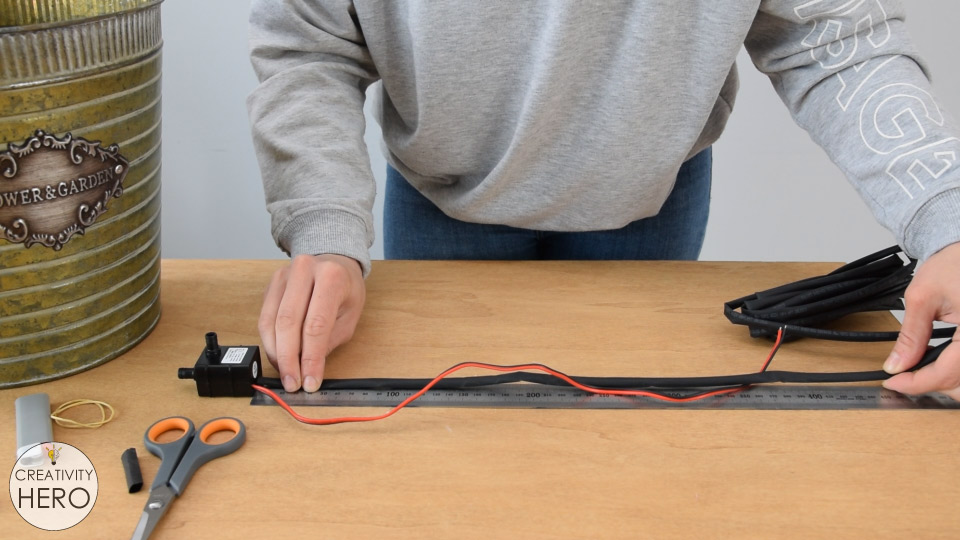
Also, I don't like the wait of the ruby and black wire without outer jacket and I decided to cover them with black oestrus shrink tubing. The length of the wires is 46 cm, but I cut around 44 cm of the heat shrink tubing, leaving two cm of the wires exposed.
For powering this pump I'm using 12 V DC power supply.
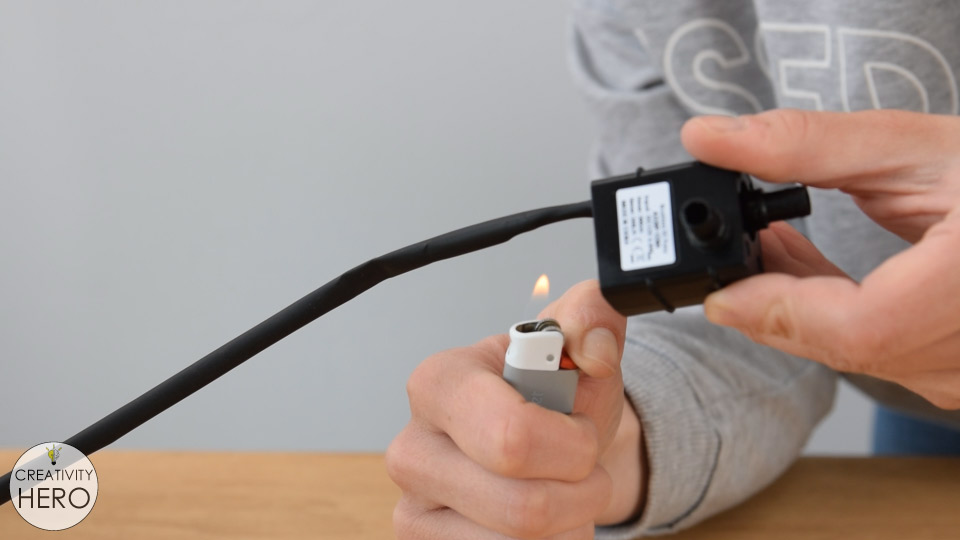
Using a lighter, I shrunk the heat compress tubing.
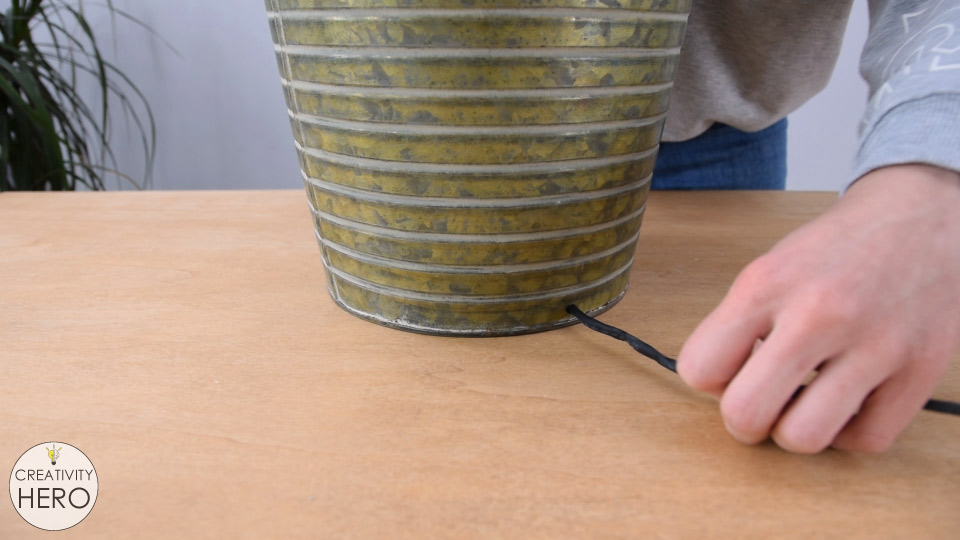
With that washed, I can run the cord through the bucket.
Another piece of heat shrink needs to get through the wires, which I'll use later in the projection.
The ends of the wires are already prepared to soldering, but I need to strip only a little bit more of the insulation of the black wire.
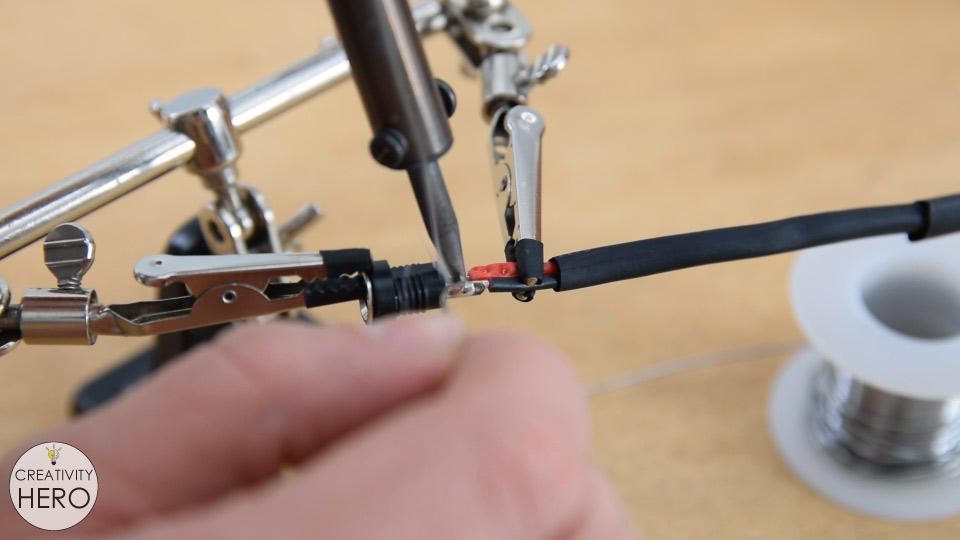
So, I soldered the crimson wire onto the shorter tip of the DC power jack, and the black wire onto the longer tip of the jack.
After that I used the lighter to shrink the rut-shrink piece I previously added, and insulated the connection.
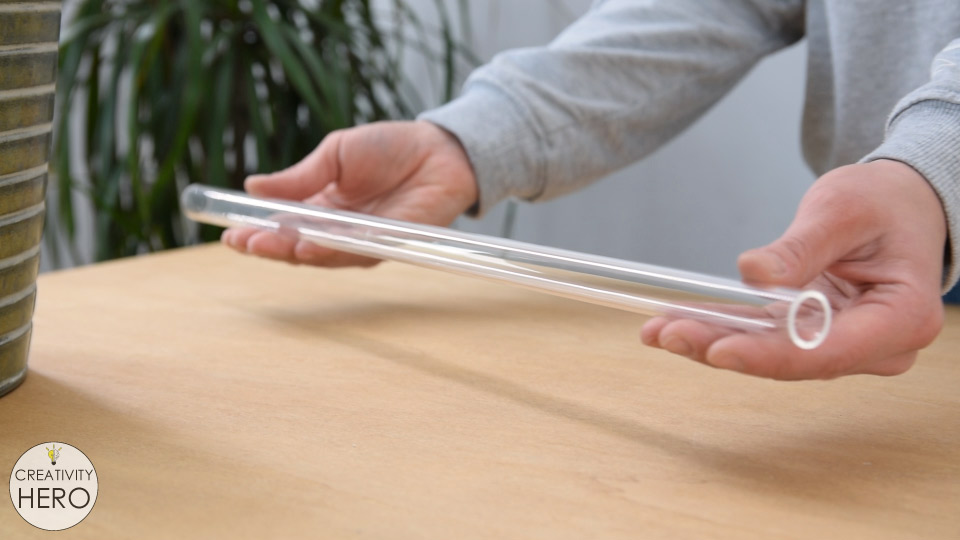
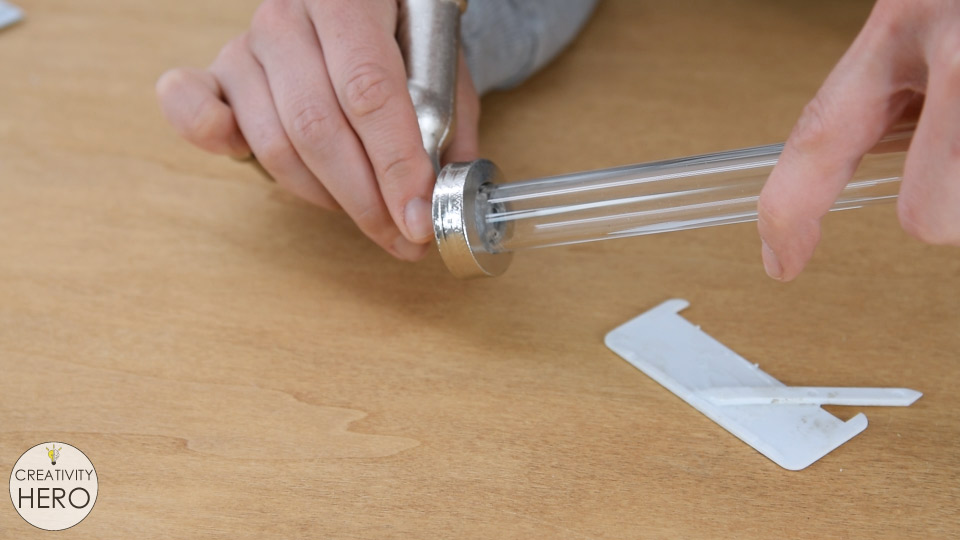
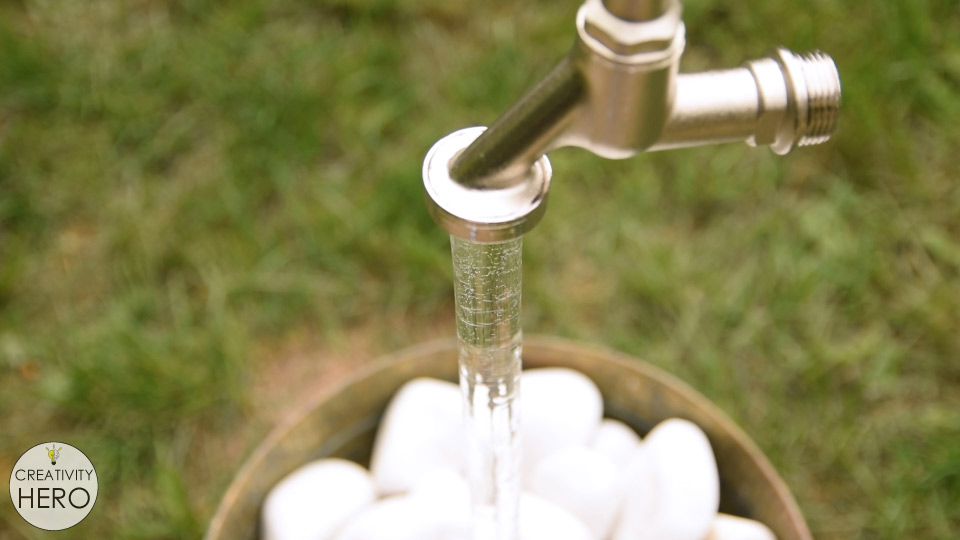
This is a clear rigid acrylic tube. It has 20 mm outer diameter and is 50 cm long, which is perfect size for my saucepan.
Before gluing the tube to the faucet, I need to drill some small holes in the top of the tube, because I want water to be able to come out of the height hands, which volition actually create the illusion we're going for.
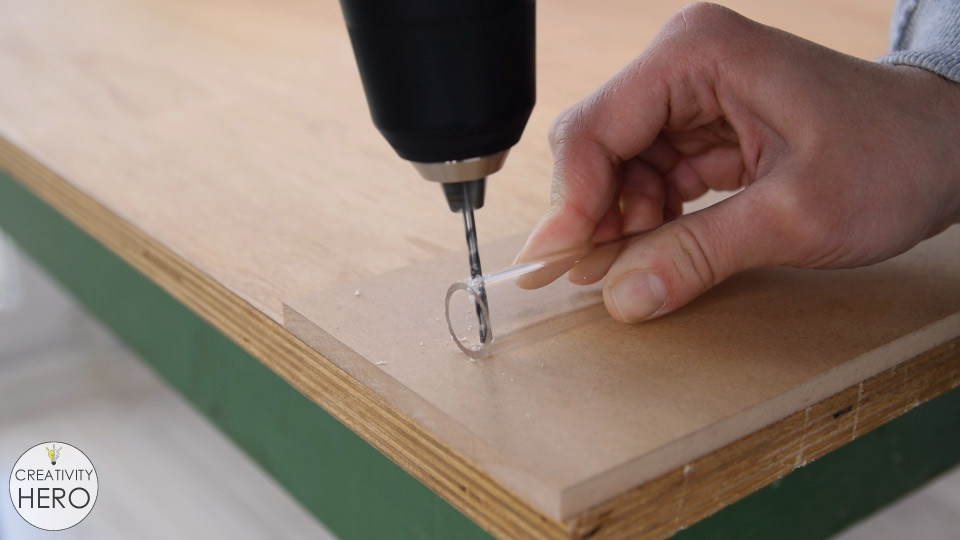
I drilled eight holes equal distance apart with 3 mm drill bit, and made sure they're really close to the summit, only 3 mm abroad.

And so I removed all the burrs with a sandpaper both inside and outside, which will additionally help brand stronger bond with the mucilage.
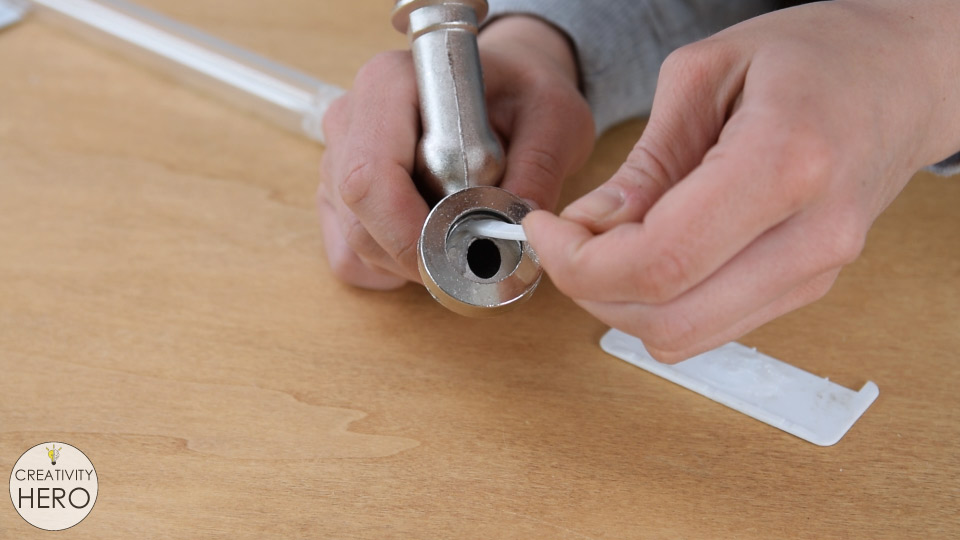
2-part epoxy is a groovy choice for gluing acrylic to metal and it only takes 5 min to cure.
I applied generous amount of epoxy inside the faucet, avoiding the sides, considering I want to have enough clear space for the holes of the acrylic tube that I previously drilled.
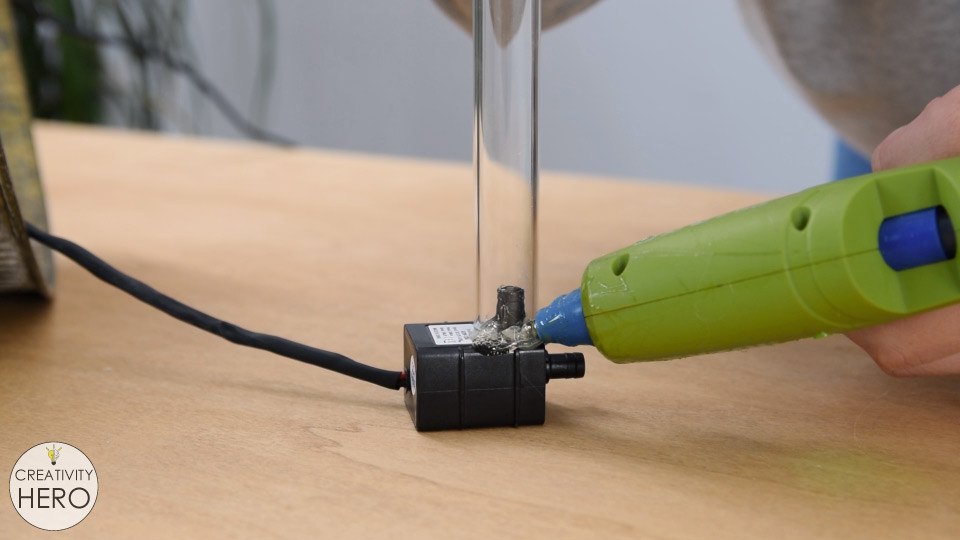
The inside diameter of the acrylic tube is too wide for the nozzle that comes with the pump. But I'll set that with hot glue.
First, I applied hot glue around the nozzle. While the glue was still hot, I placed the tube above the nozzle. So, I applied big amount of hot glue effectually the tube.
At present the tube is fastened to the pump and the faucet and the glue is completely cured, and then I can move on with the projection.
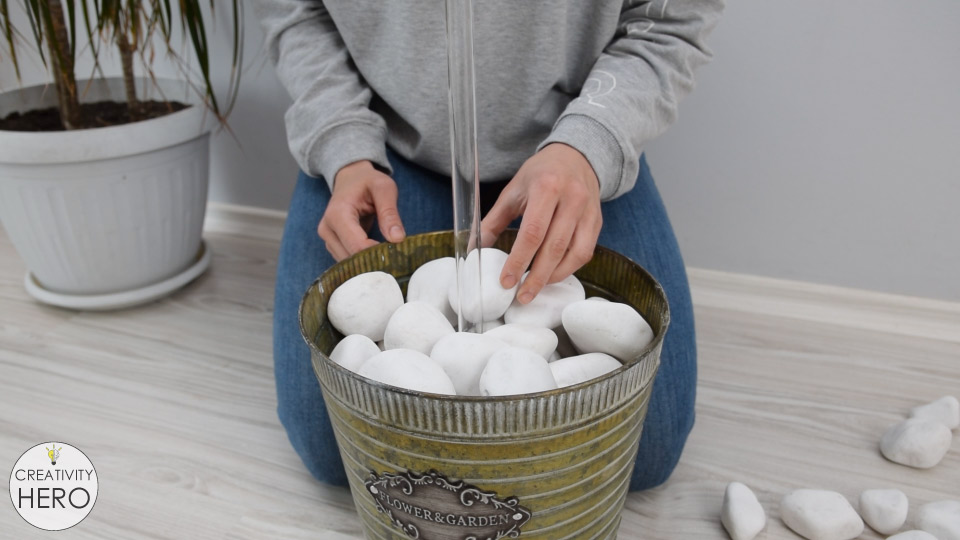
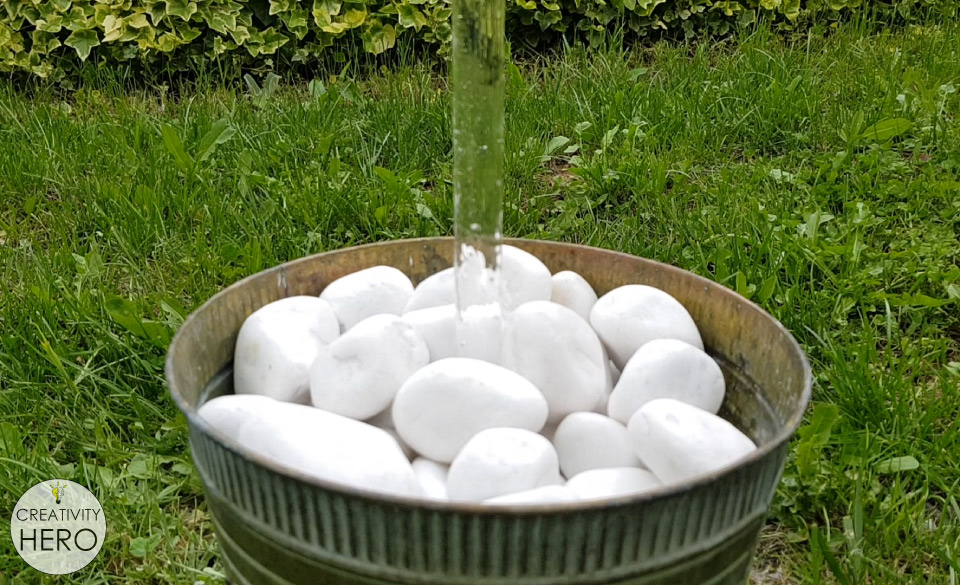
At this point, I positioned the tube in the middle of the bucket, and started pilling the river rocks up. The rocks are going to agree everything in place.
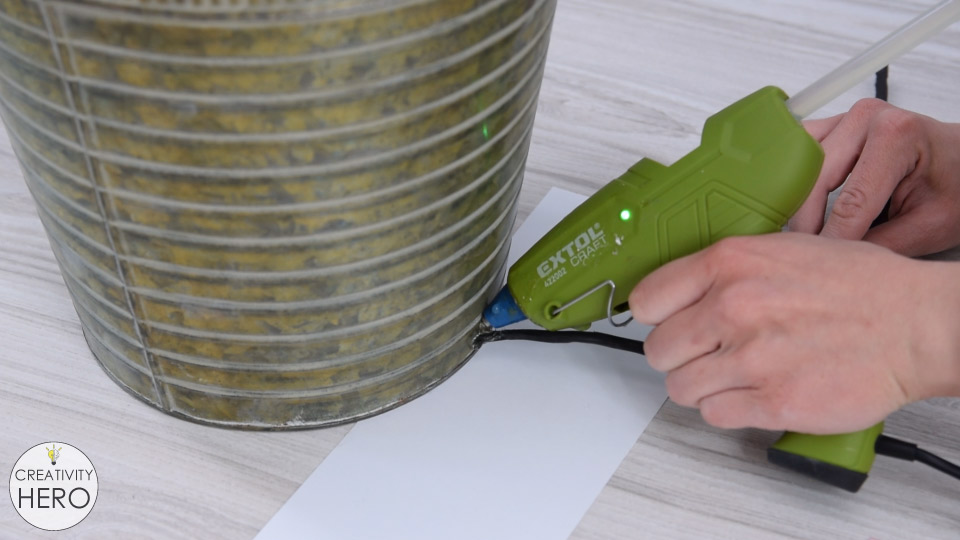
The pump is inside the saucepan, the tube is straight up, and the faucet is in the right position, which means that everything is in place. The cord is down behind the faucet, so we can seal off the pigsty where the cord is running out. I'm going to use some hot gum for that.
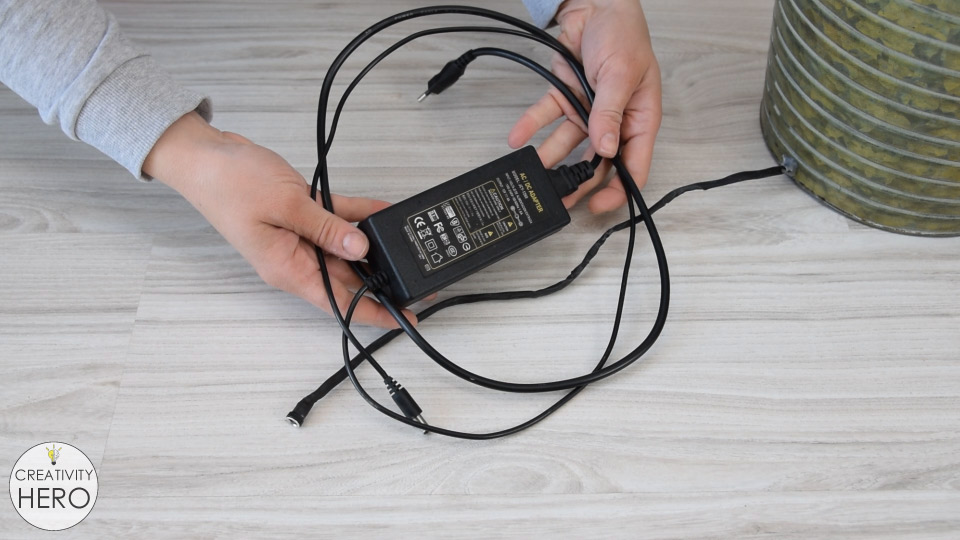
This is the ability adapter that I'm using. I already mentioned that for powering the pump I'm going to use 12 V DC ability supply. At present I need to connect the pump to the adapter and plug it in.
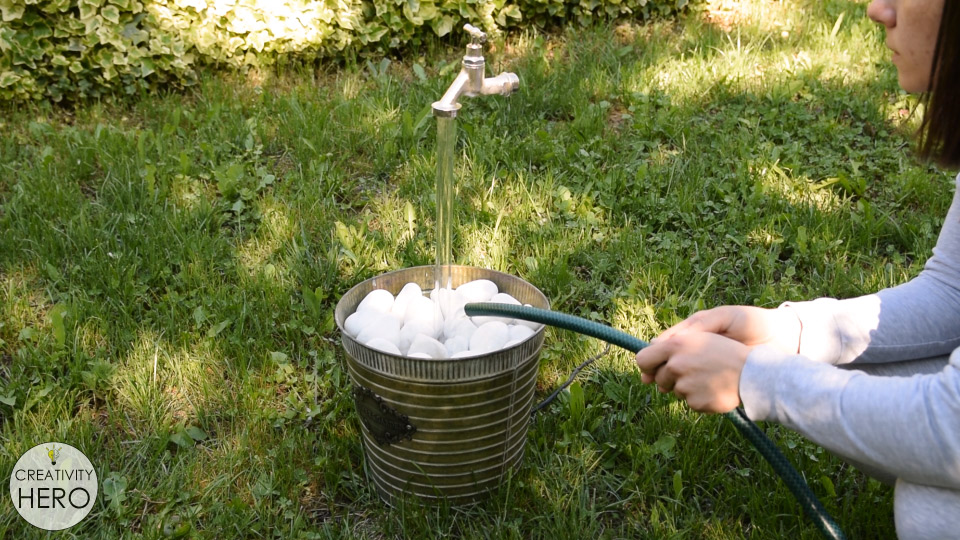
The final pace is adding some h2o in the bucket. You tin can add every bit much water as you desire.
OK. So, let's plug the fountain in and run into how it works.
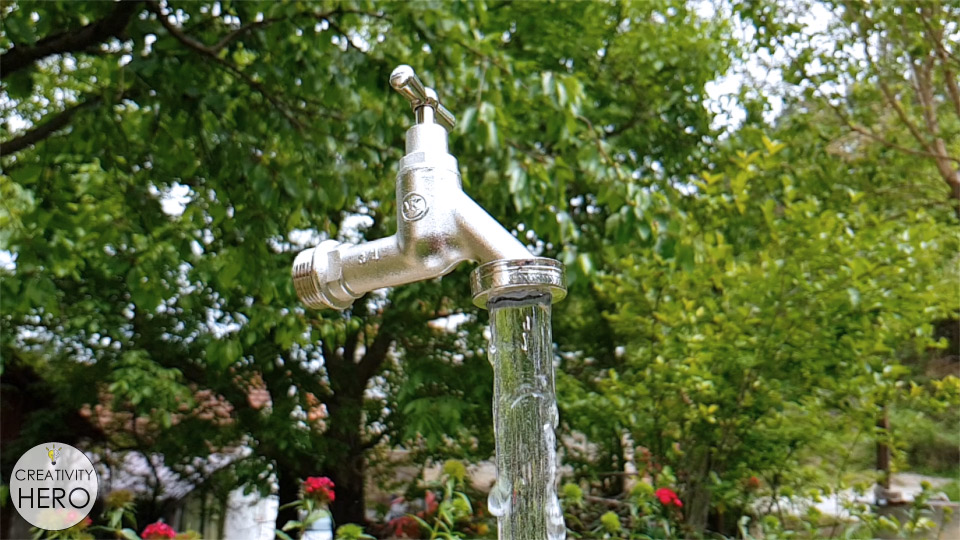
The water came up out the holes in the peak of the tube and started flowing effectually the sides. And this is exactly what we need.
The illusion of floating faucet is achieved, which means that I'm done with this project. I really like how information technology turned out. It looks absolutely astonishing.
This was very fun projection, and is something y'all can definitely try at home.
If you like this project give me a thumbs upwards, get out a annotate down below and don't forget to subscribe to my YouTube channel.

How To Make A Magic Faucet Fountain,
Source: https://creativityhero.com/diy-projects/how-to-make-a-floating-faucet-fountain-diy-project/
Posted by: ruizhoper1989.blogspot.com
0 Response to "How To Make A Magic Faucet Fountain"
Post a Comment